


Saya coba perbandingkan antara PRESSPULL dan EXTRUDE serta LOFT dan REVOLVE agar ketika mencobanya dapat mengambil kesimpulan perintah mana yang cocok untuk mengerjakan desain anda. Selamat mencoba !
I. PRESSPULL v.s EXTRUDE
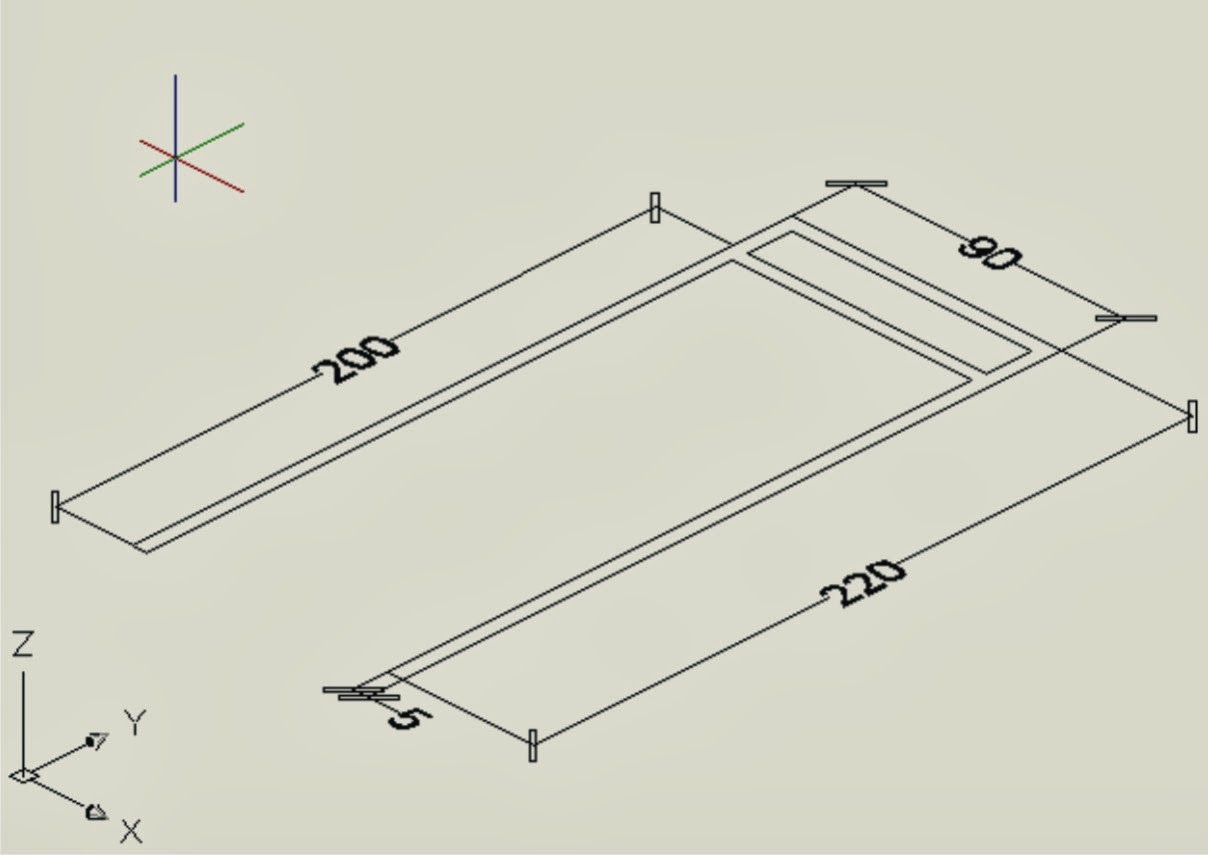
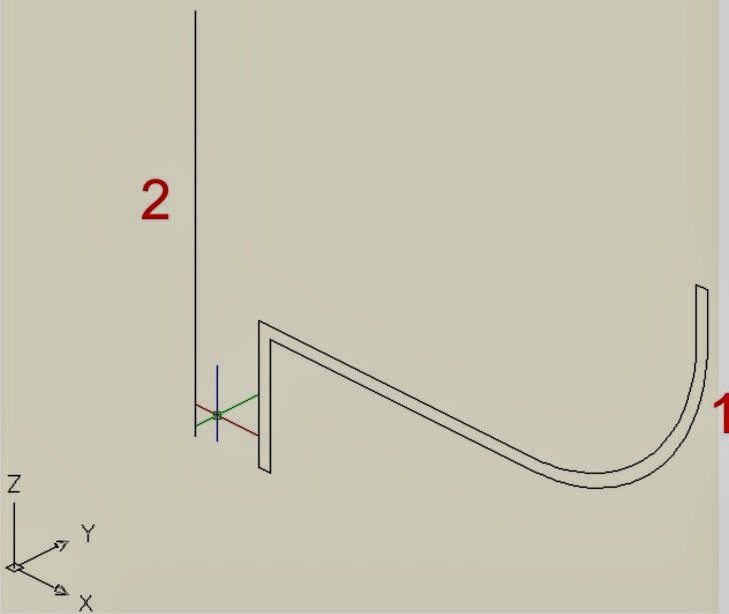
a. Setelah mengatur Viewport menjadi 3 Viewport (3 sudut pandang, salah satu viewportnya atur pada pandangan perspektif dengan perintah VP, absolute to WCS from X axisnya = 315 dan From XY plan = 30) buatlah objek seperti di bawah dengan perintah line (jangan pake Pline ! biar kelihatan perbedaannya).
click
inside boumded area to prees or pull. 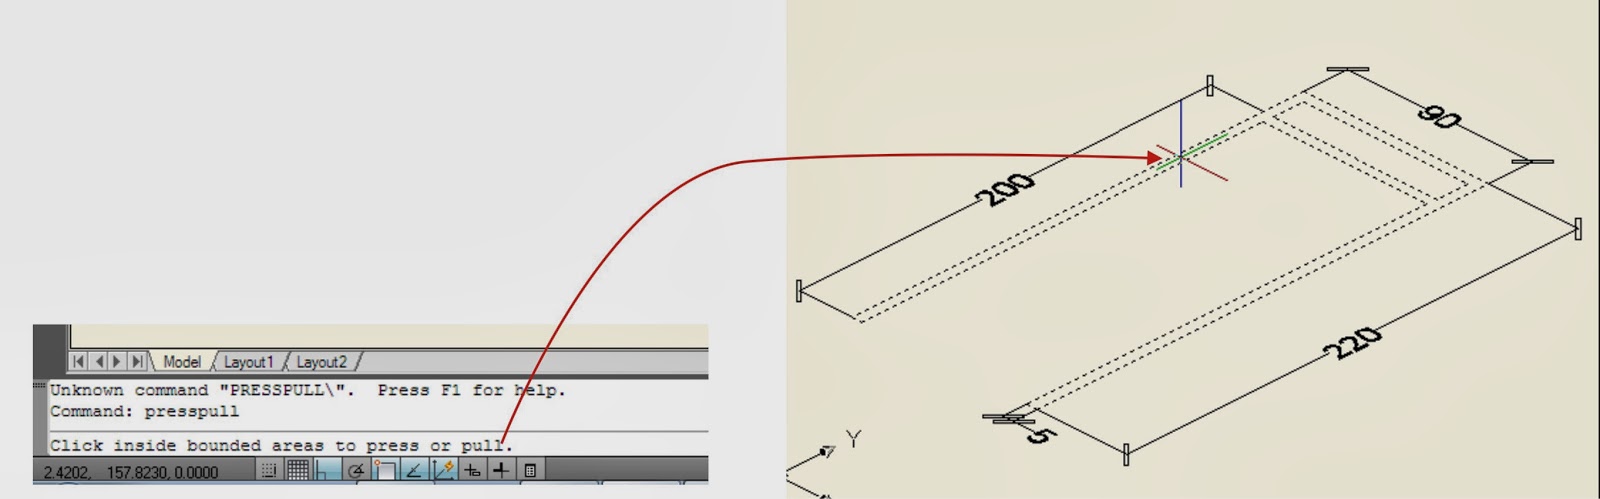

PEDIT Select polyline or [Multiple]: ketik m lalu enter
Select objects: ketikan all atau pilih seluruh garis lalu enter
16 found
Select objects:--- enter
Convert Lines, Arcs and Splines to polylines [Yes/No]? --- enter
Enter an option [Close/Open/Join/Width/Fit/Spline/Decurve/Ltype
gen/Reverse/Undo]: ketik j untuk memilih pilihan join lalu enter
Join Type = Extend
Enter fuzz distance or [Jointype] <0 data-blogger-escaped-.0000="">:
10 segments added to 2 polylines --- enter
Enter an option [Close/Open/Join/Width/Fit/Spline/Decurve/Ltype
gen/Reverse/Undo]: --- enter
g. Pada command line ketikan perintah EXT lalu enter untuk menjalankan perintah EXTRUDE.
EXTRUDE
Current wire frame density: ISOLINES=4
Select objects to extrude: Specify opposite corner: 0 found
Select objects to extrude: 1 found --- klik pada objek 1
Select objects to extrude: 1 found, 2 total --- klik pada objek 2
Select objects to extrude:--- enter
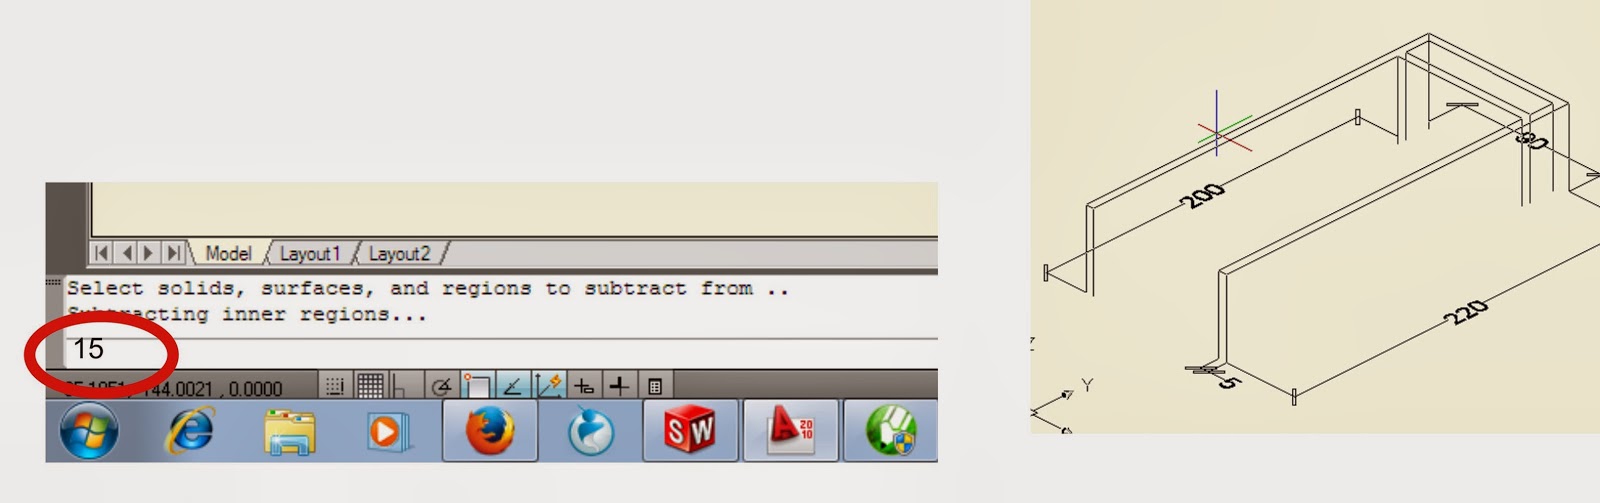
Specify height of extrusion or [Direction/Path/Taper angle] <15 data-blogger-escaped-.0000="">: masukan nilai 15 lalu enter.
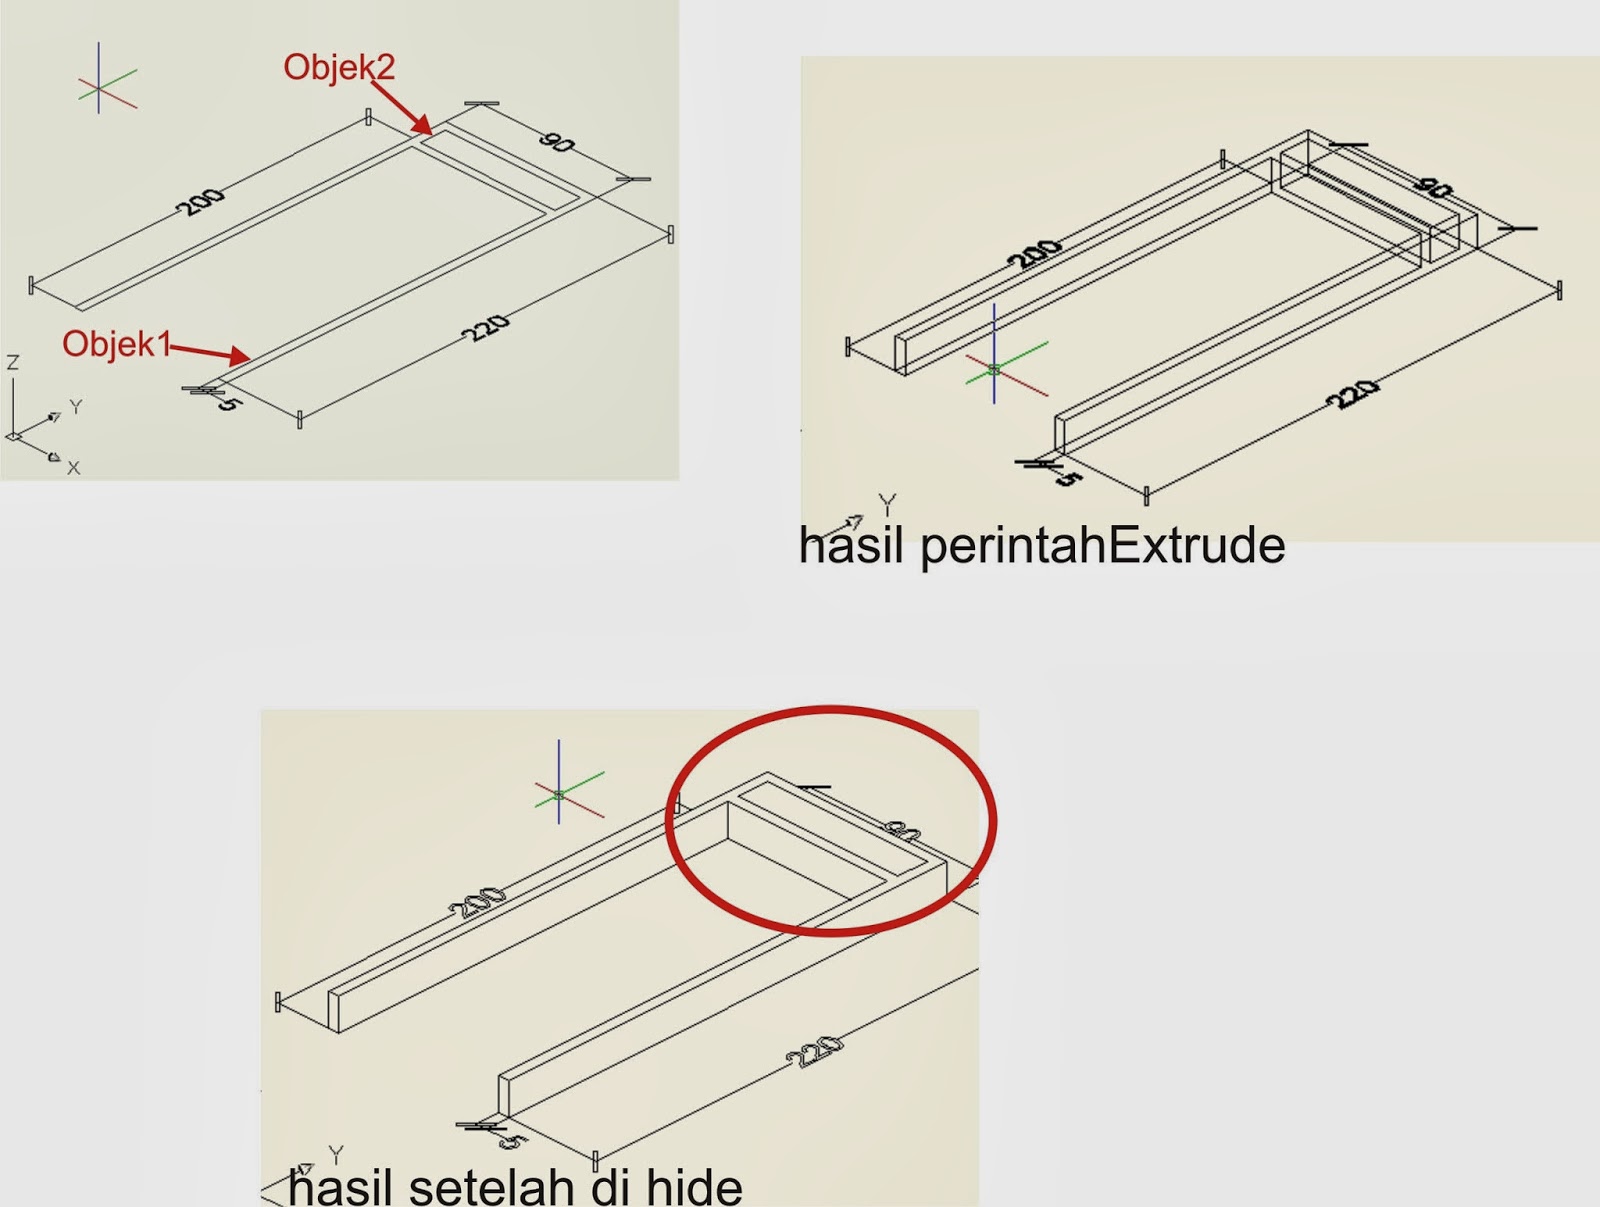
h. Perhatikan bagian yang di tandai lingkaran merah !, pada objek hasil extrude setelah di hide tampak bagian objek 2 ikut terextrude sehingga kita sekarang memiliki 2 buah objek extrude. untuk membuat lubang pada objek 1 jalankan perintah subtract.
Command: subtract
Select solids, surfaces, and regions to subtract from ..
Select objects: 1 found --- klik pada objek1
Select objects: --- enter
Select solids, surfaces, and regions to subtract ..
Select objects: 1 found --- klik pada objek 2
Select objects:--- enter
i. Coba sekarang hapus objek hasil extrude tadi !, hasilnya adalah semua objek terhapus.
Demikian salah satu perbedaan antara perintah EXTRUDE dan PRESSPULL , semoga dapat di ambil kesimpulan.
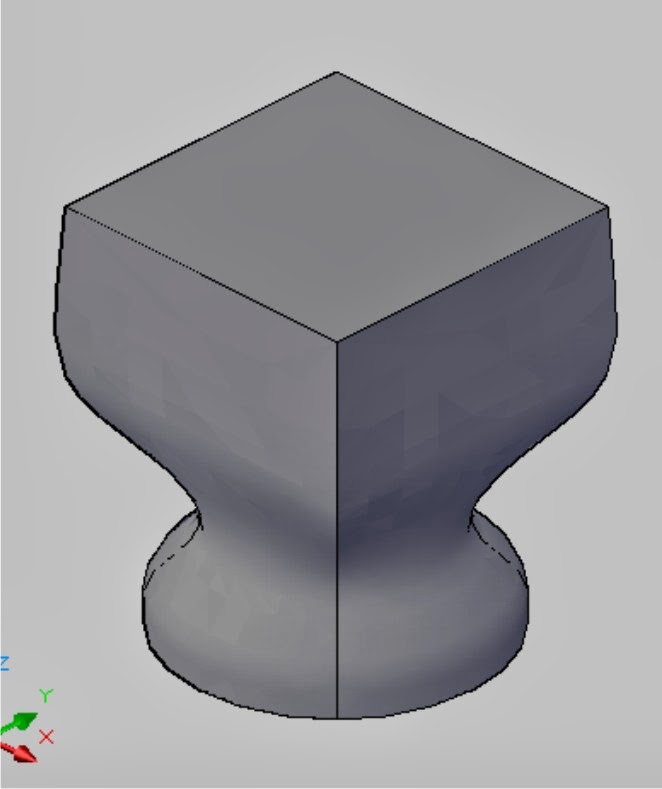
j.Untuk melihat perbedaan lain coba buka file latihan ini, kemudian ikuti instruksi seperti yamg di contohkan gambar dibawah.
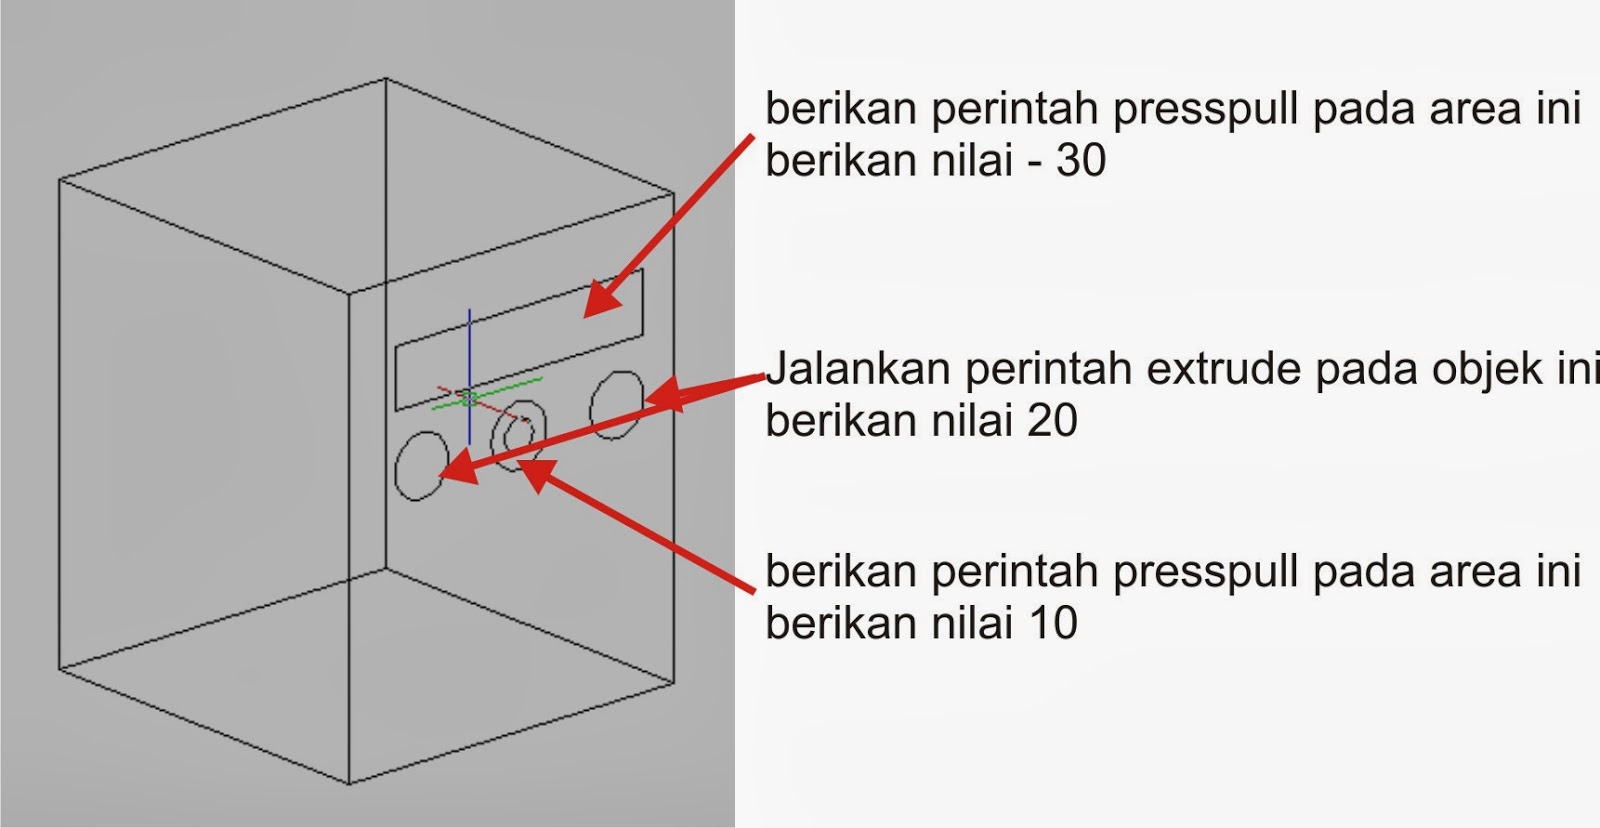
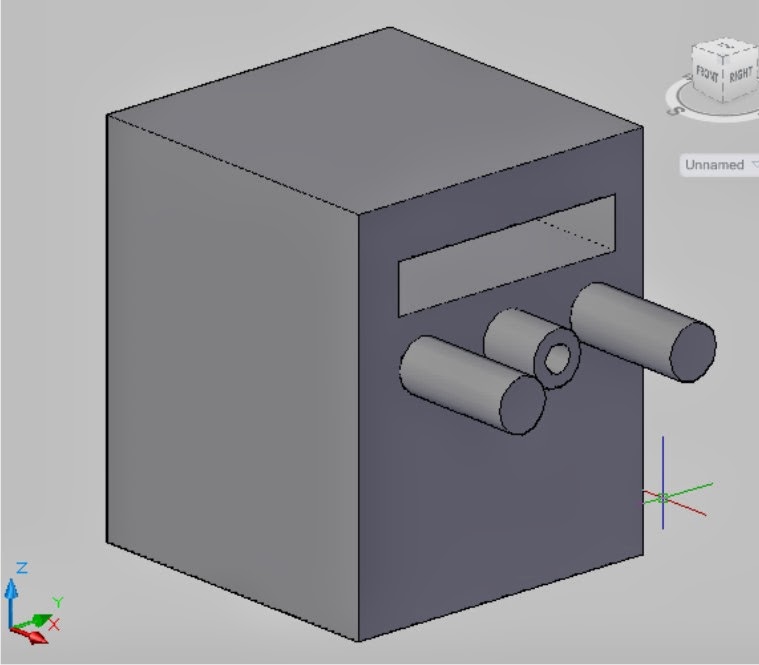
k. Setelah selesai lihat hasilnya akan seperti contoh gambar di bawah ini (aktifkan view - visual style - conceptual), kemudian coba pilih salah satu objek hasil extrude lalu hapus !, coba pilih objek hasil presspull kemudian delete..!, nah demikian kira - kira perbedaan antara perintah PRESSPULL dan EXTRUDE ..
LOFT V.S REVOLVE
LOFT
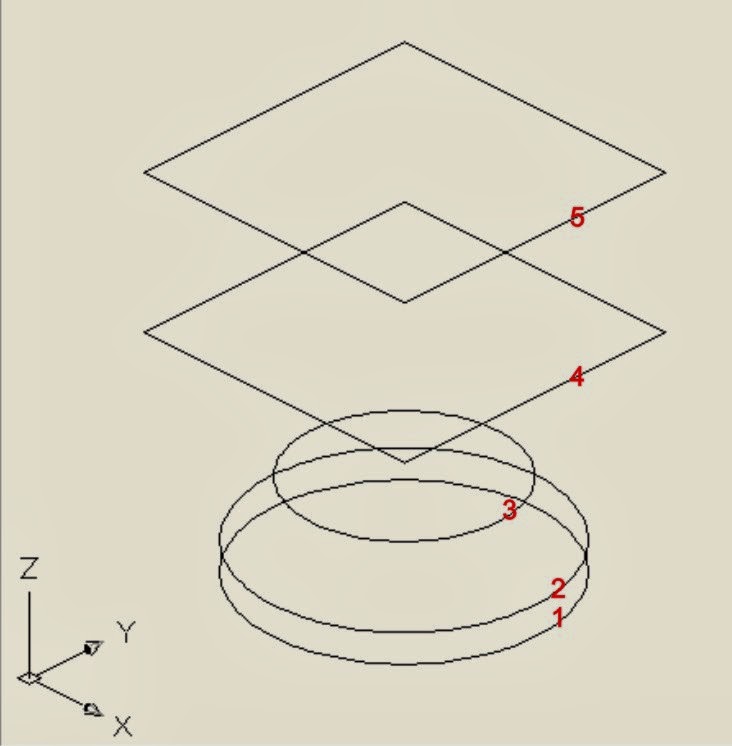
a. Buat object seperti di bawah ini
b. Pada command line ketikan loft,
Command: LOFT :
Select cross sections in lofting order: 1 found --klik object 1
Select cross sections in lofting order: 1 found, 2 total --- klik object 2
Select cross sections in lofting order: 1 found, 3 total --- klik object 3
Select cross sections in lofting order: 1 found, 4 total --- klik objec 4
Select cross sections in lofting order: 1 found, 5 total --- klik object 5
Select cross sections in lofting order: -- enter
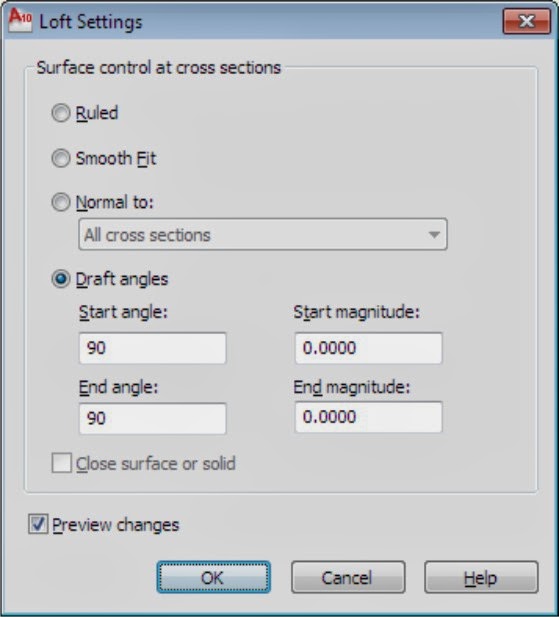
Enter an option [Guides/Path/Cross sections only] : --- enter
klik oke
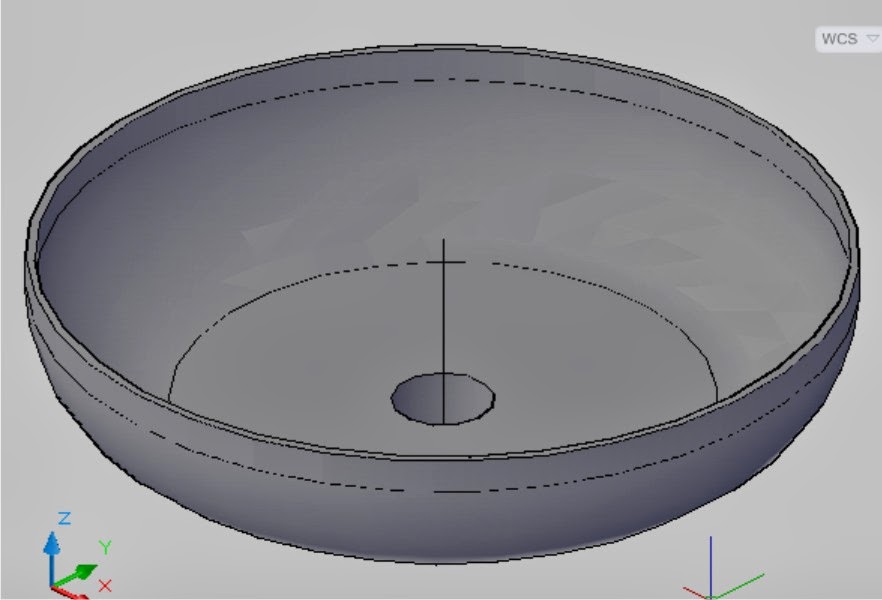
c. Hasilnya seperti gambar berikut:
REVOLVE
a. Buat Object seperti contoh di bawah !
b. Jalankan perintah Revolve, kemudian ikuti langkah-langkahnya
Command: revolve
Current wire frame density: ISOLINES=4
Select objects to revolve: 1 found --- klik object 1
Select objects to revolve: --- enter
Specify axis start point or define axis by [Object/X/Y/Z] : -- enter
Select an object: klik objeck 2
Specify angle of revolution or [STart angle] <360>: --- enter
c. Hasilnya seperti gambar berikut :
SWEEP
SWEEP .
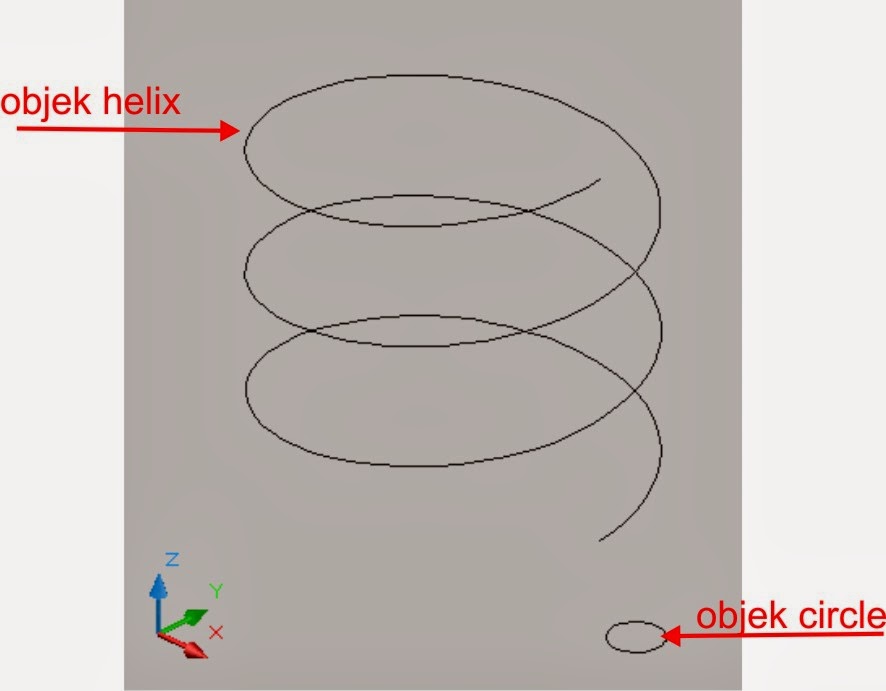
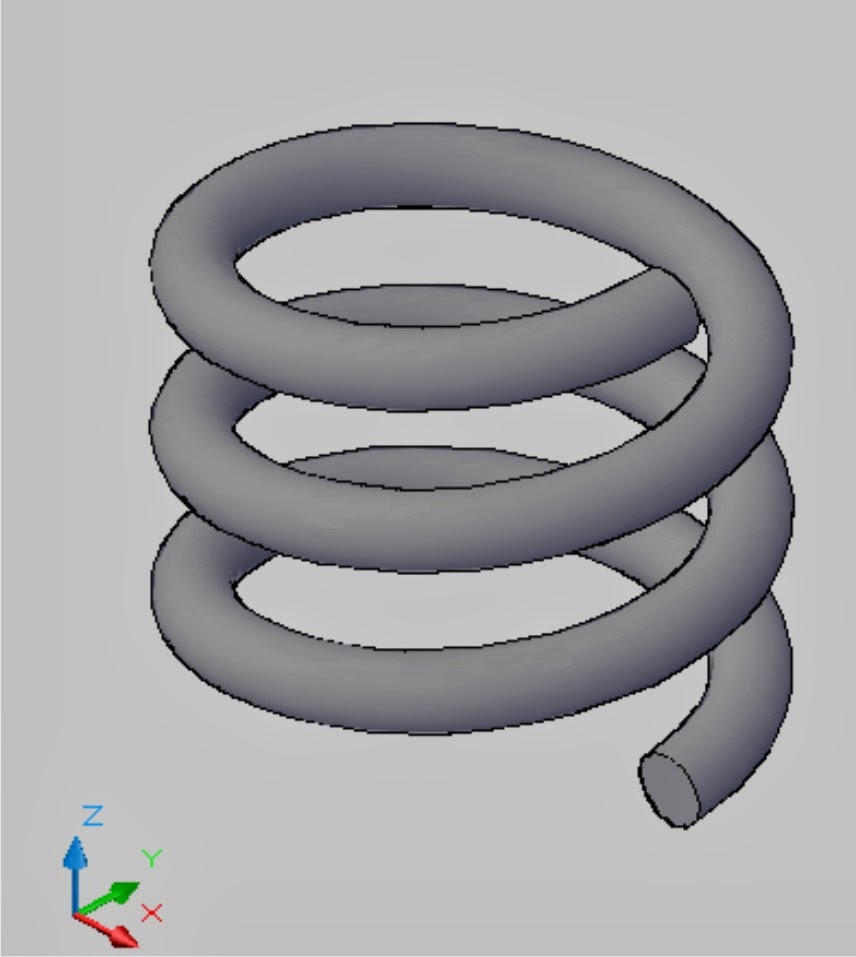
a. Buat objek helix dan circle seperti contoh di bawah !
b. Jalankan perintah sweep, ikuti langkah - langkah berikut :
Command: sweep
Current wire frame density: ISOLINES=4
Select objects to sweep: 1 found --- klik objek circle
Select objects to sweep: -- enter
Select sweep path or [Alignment/Base point/Scale/Twist]: --- klik objek helix, hasilnya seperti contoh di bawah ..

Trims, sgt membantu sekali
BalasHapusArtikelnya bagus admin
BalasHapusMenggunakan Perintah 3D Autocad ( Presspull, Extrude, Revolve, Loft, Sweep) >>>>> Download Now
BalasHapus>>>>> Download Full
Menggunakan Perintah 3D Autocad ( Presspull, Extrude, Revolve, Loft, Sweep) >>>>> Download LINK
>>>>> Download Now
Menggunakan Perintah 3D Autocad ( Presspull, Extrude, Revolve, Loft, Sweep) >>>>> Download Full
>>>>> Download LINK to